One of the most straightforward and flexible ways to add customers in Retainly is through manual creation. This guide will walk you through the process of manually adding, editing, and deleting customers, ensuring you have all the tools you need to keep your customers list up to date.
Creating a New customer #
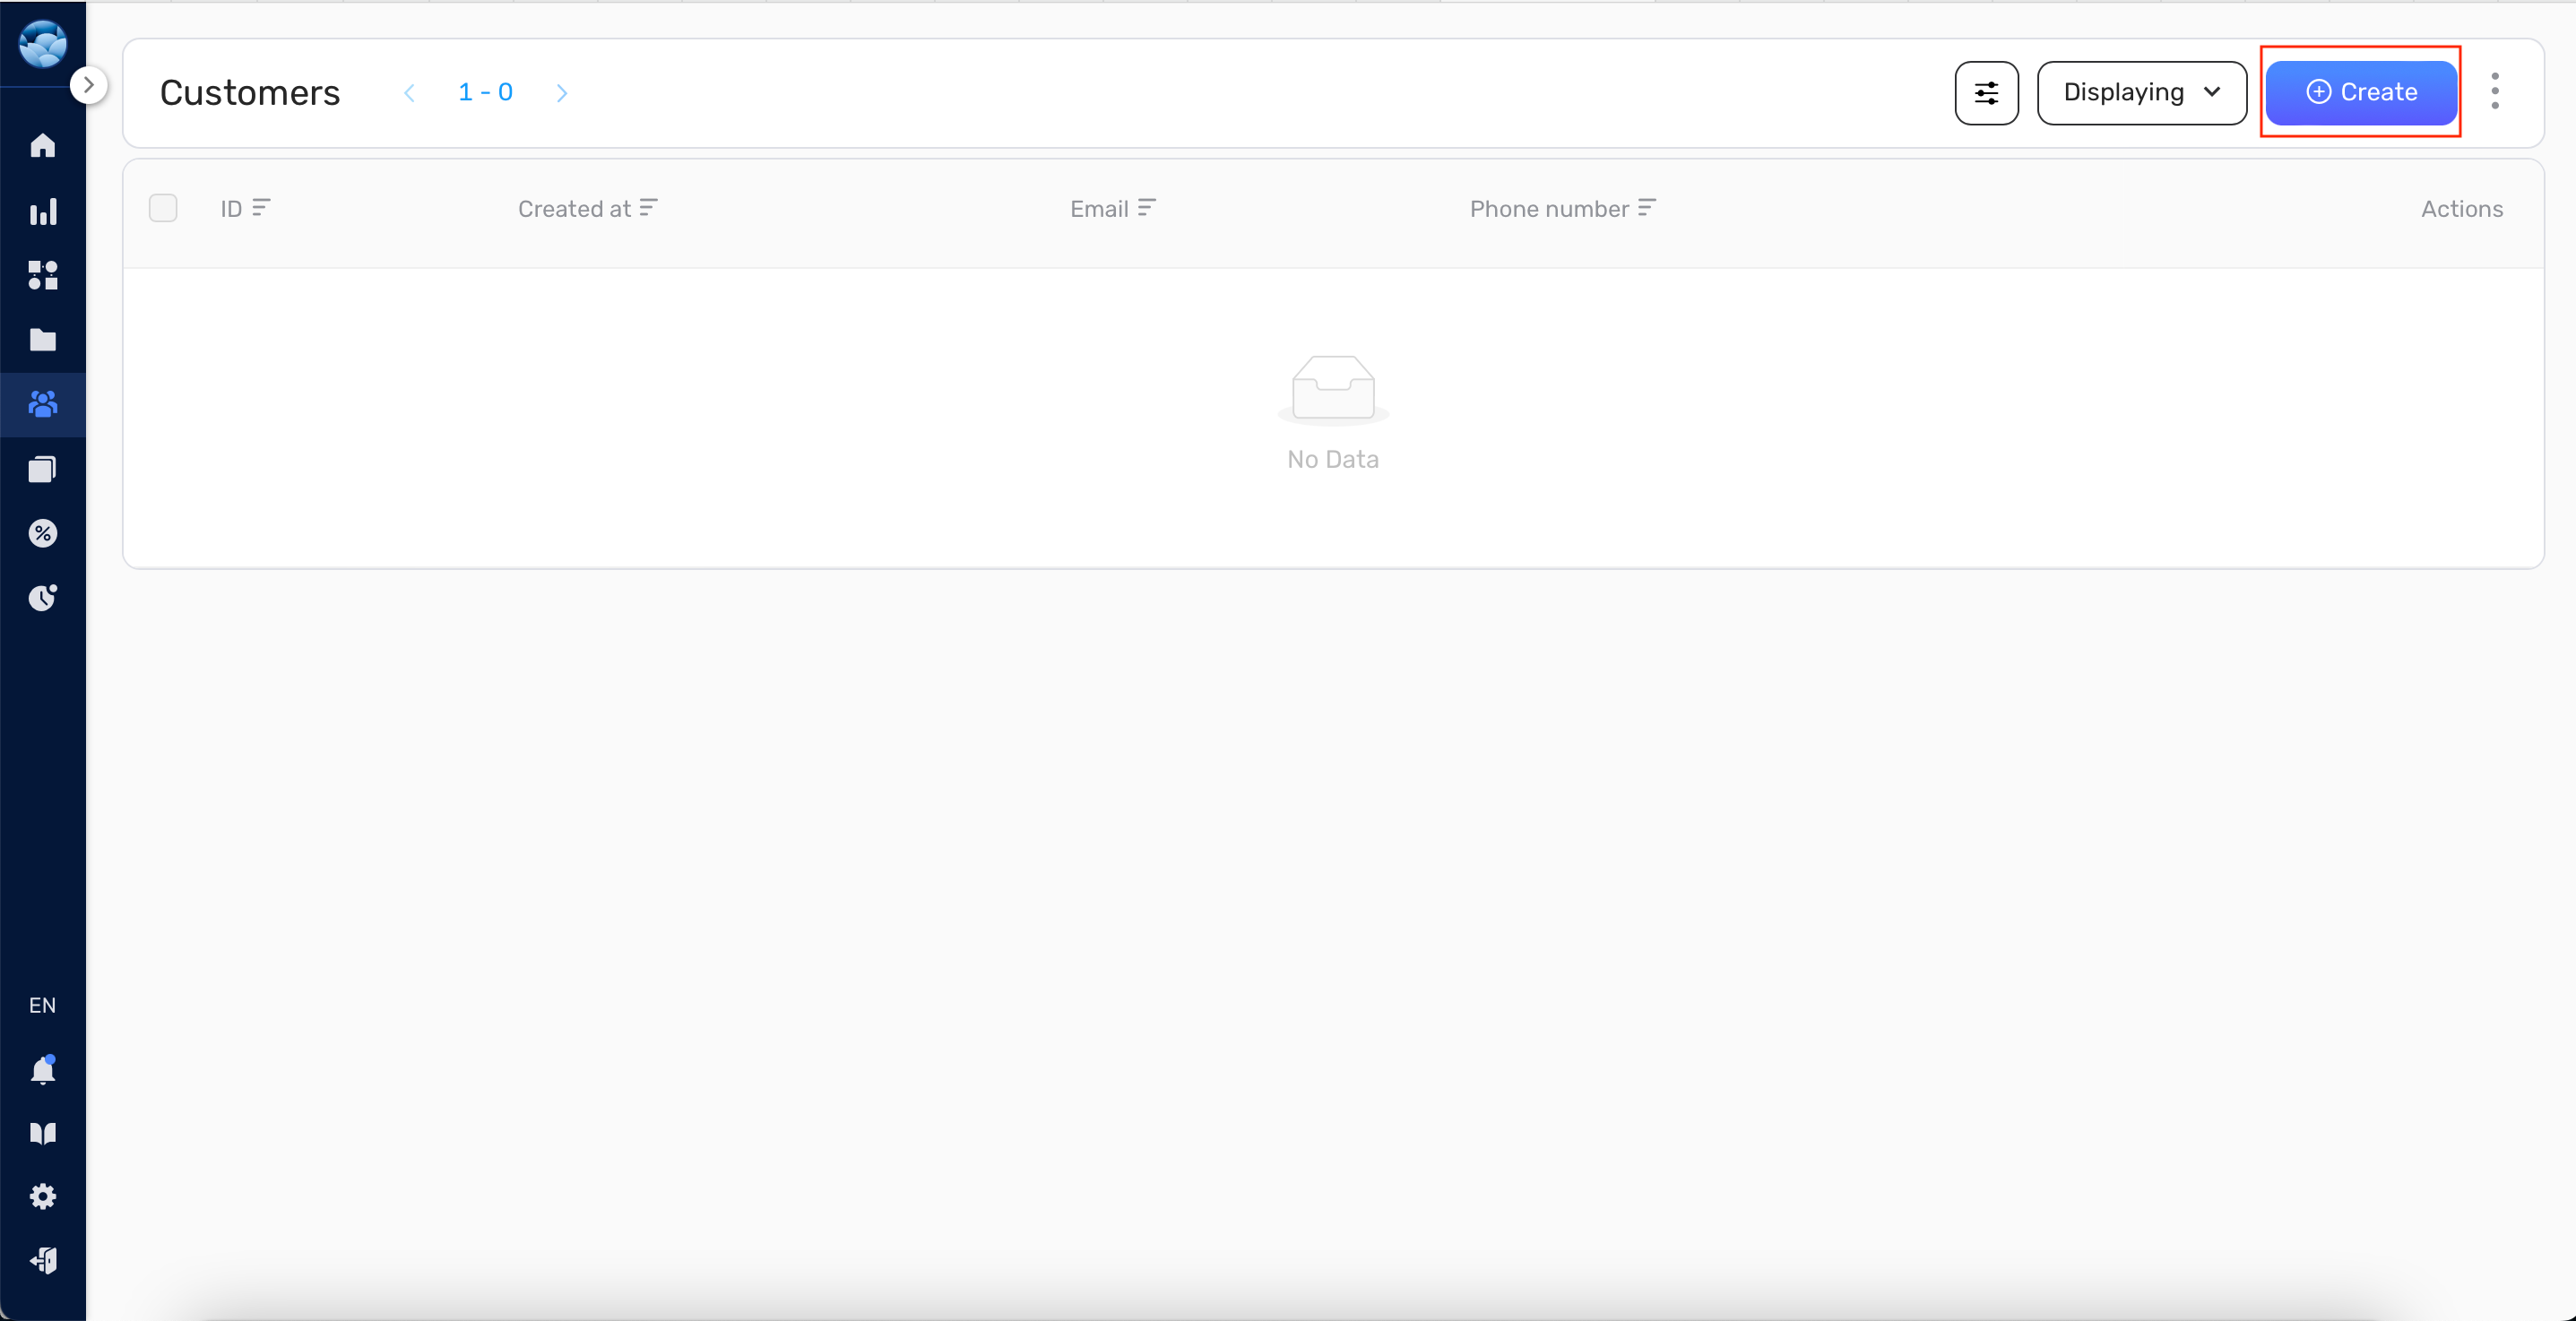
- On the sidebar, go to Customers and select All.
- Click on the Create button to open the new customer form.
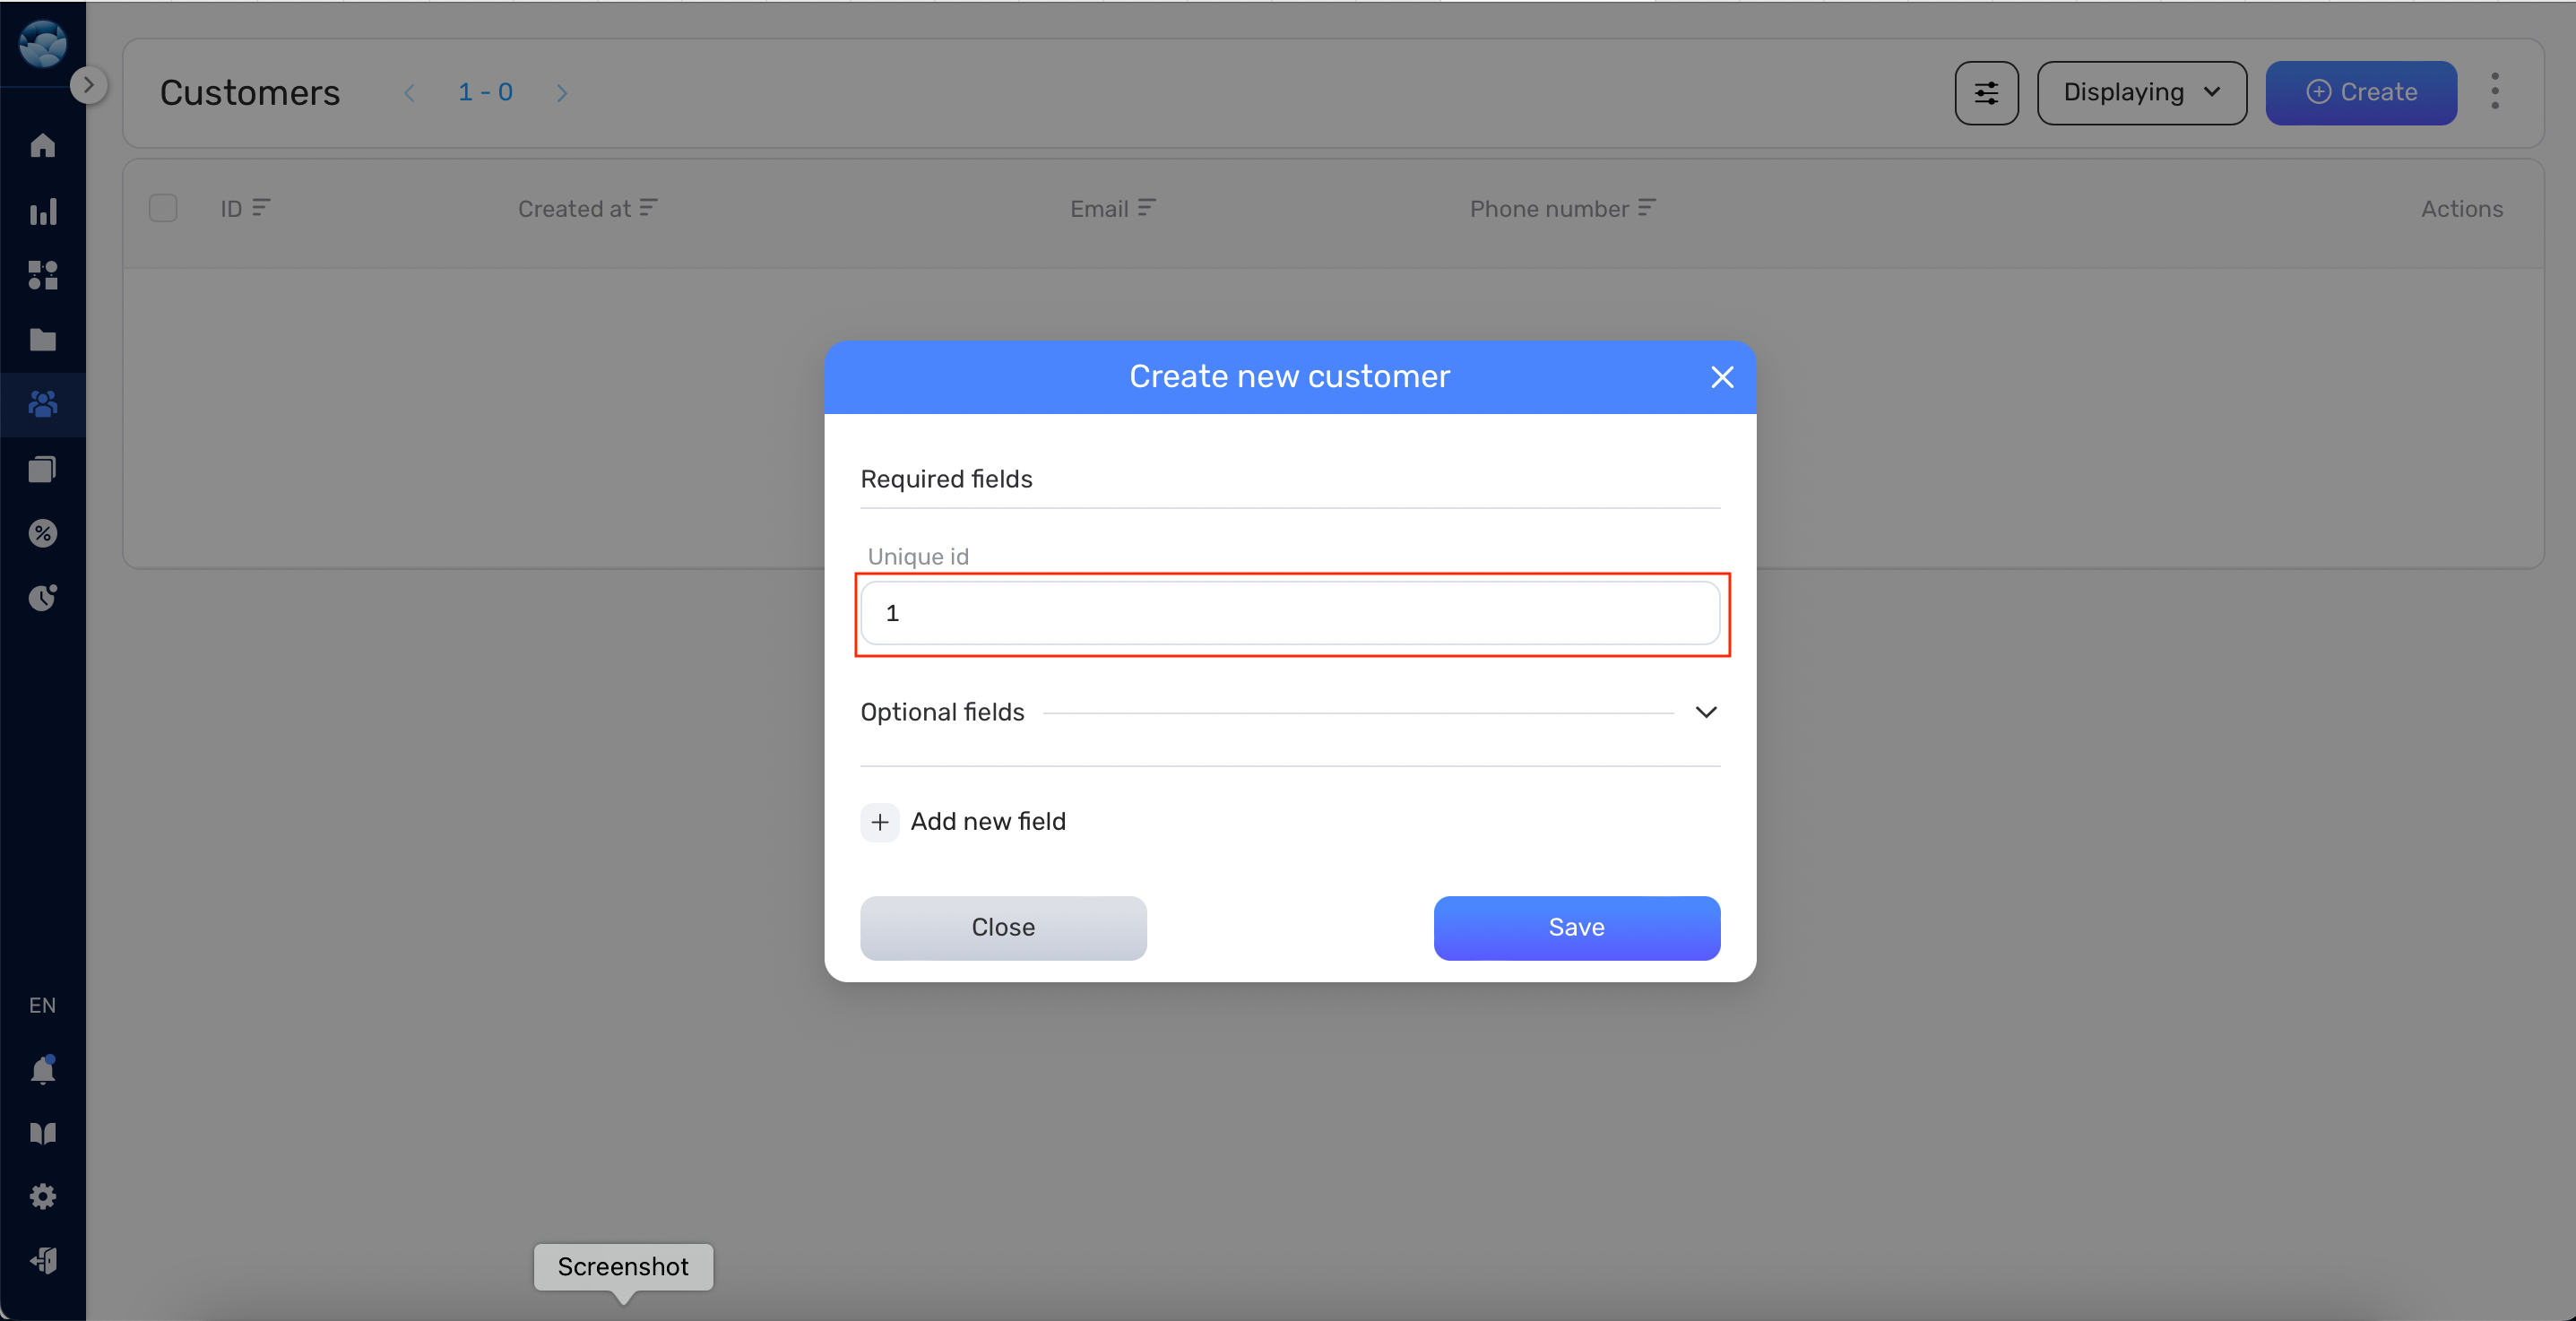
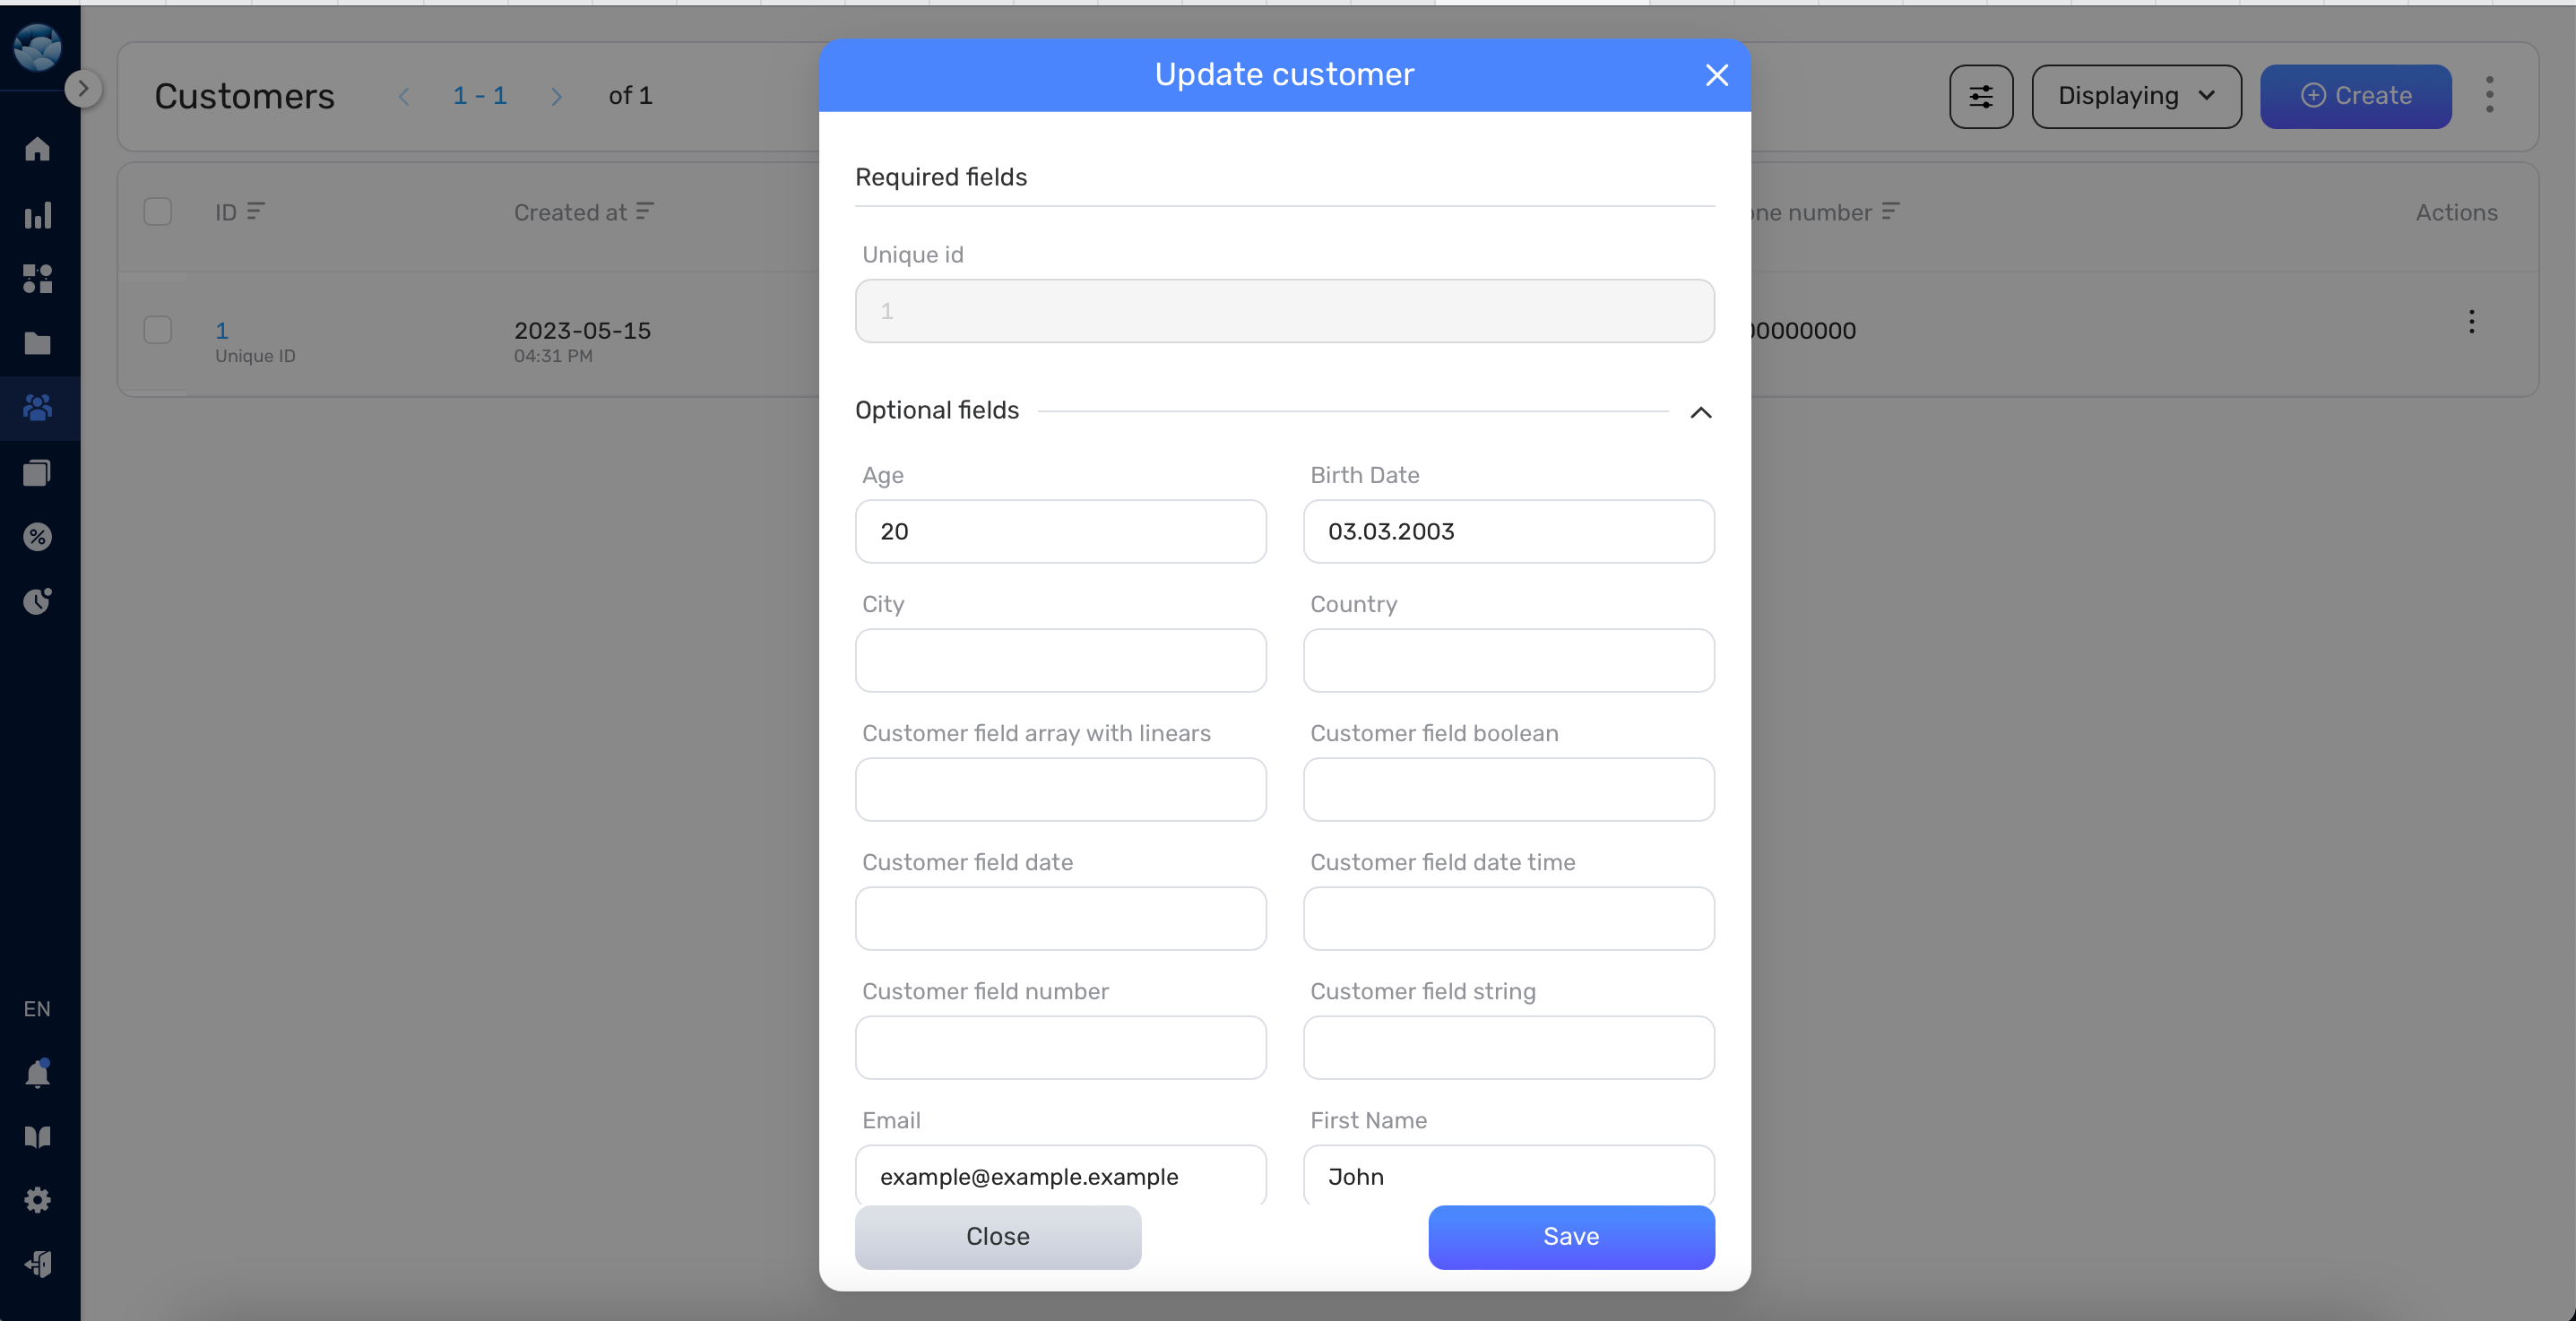
- Fill in the required Unique Id field.
- Complete any additional fields from the optional list as necessary.

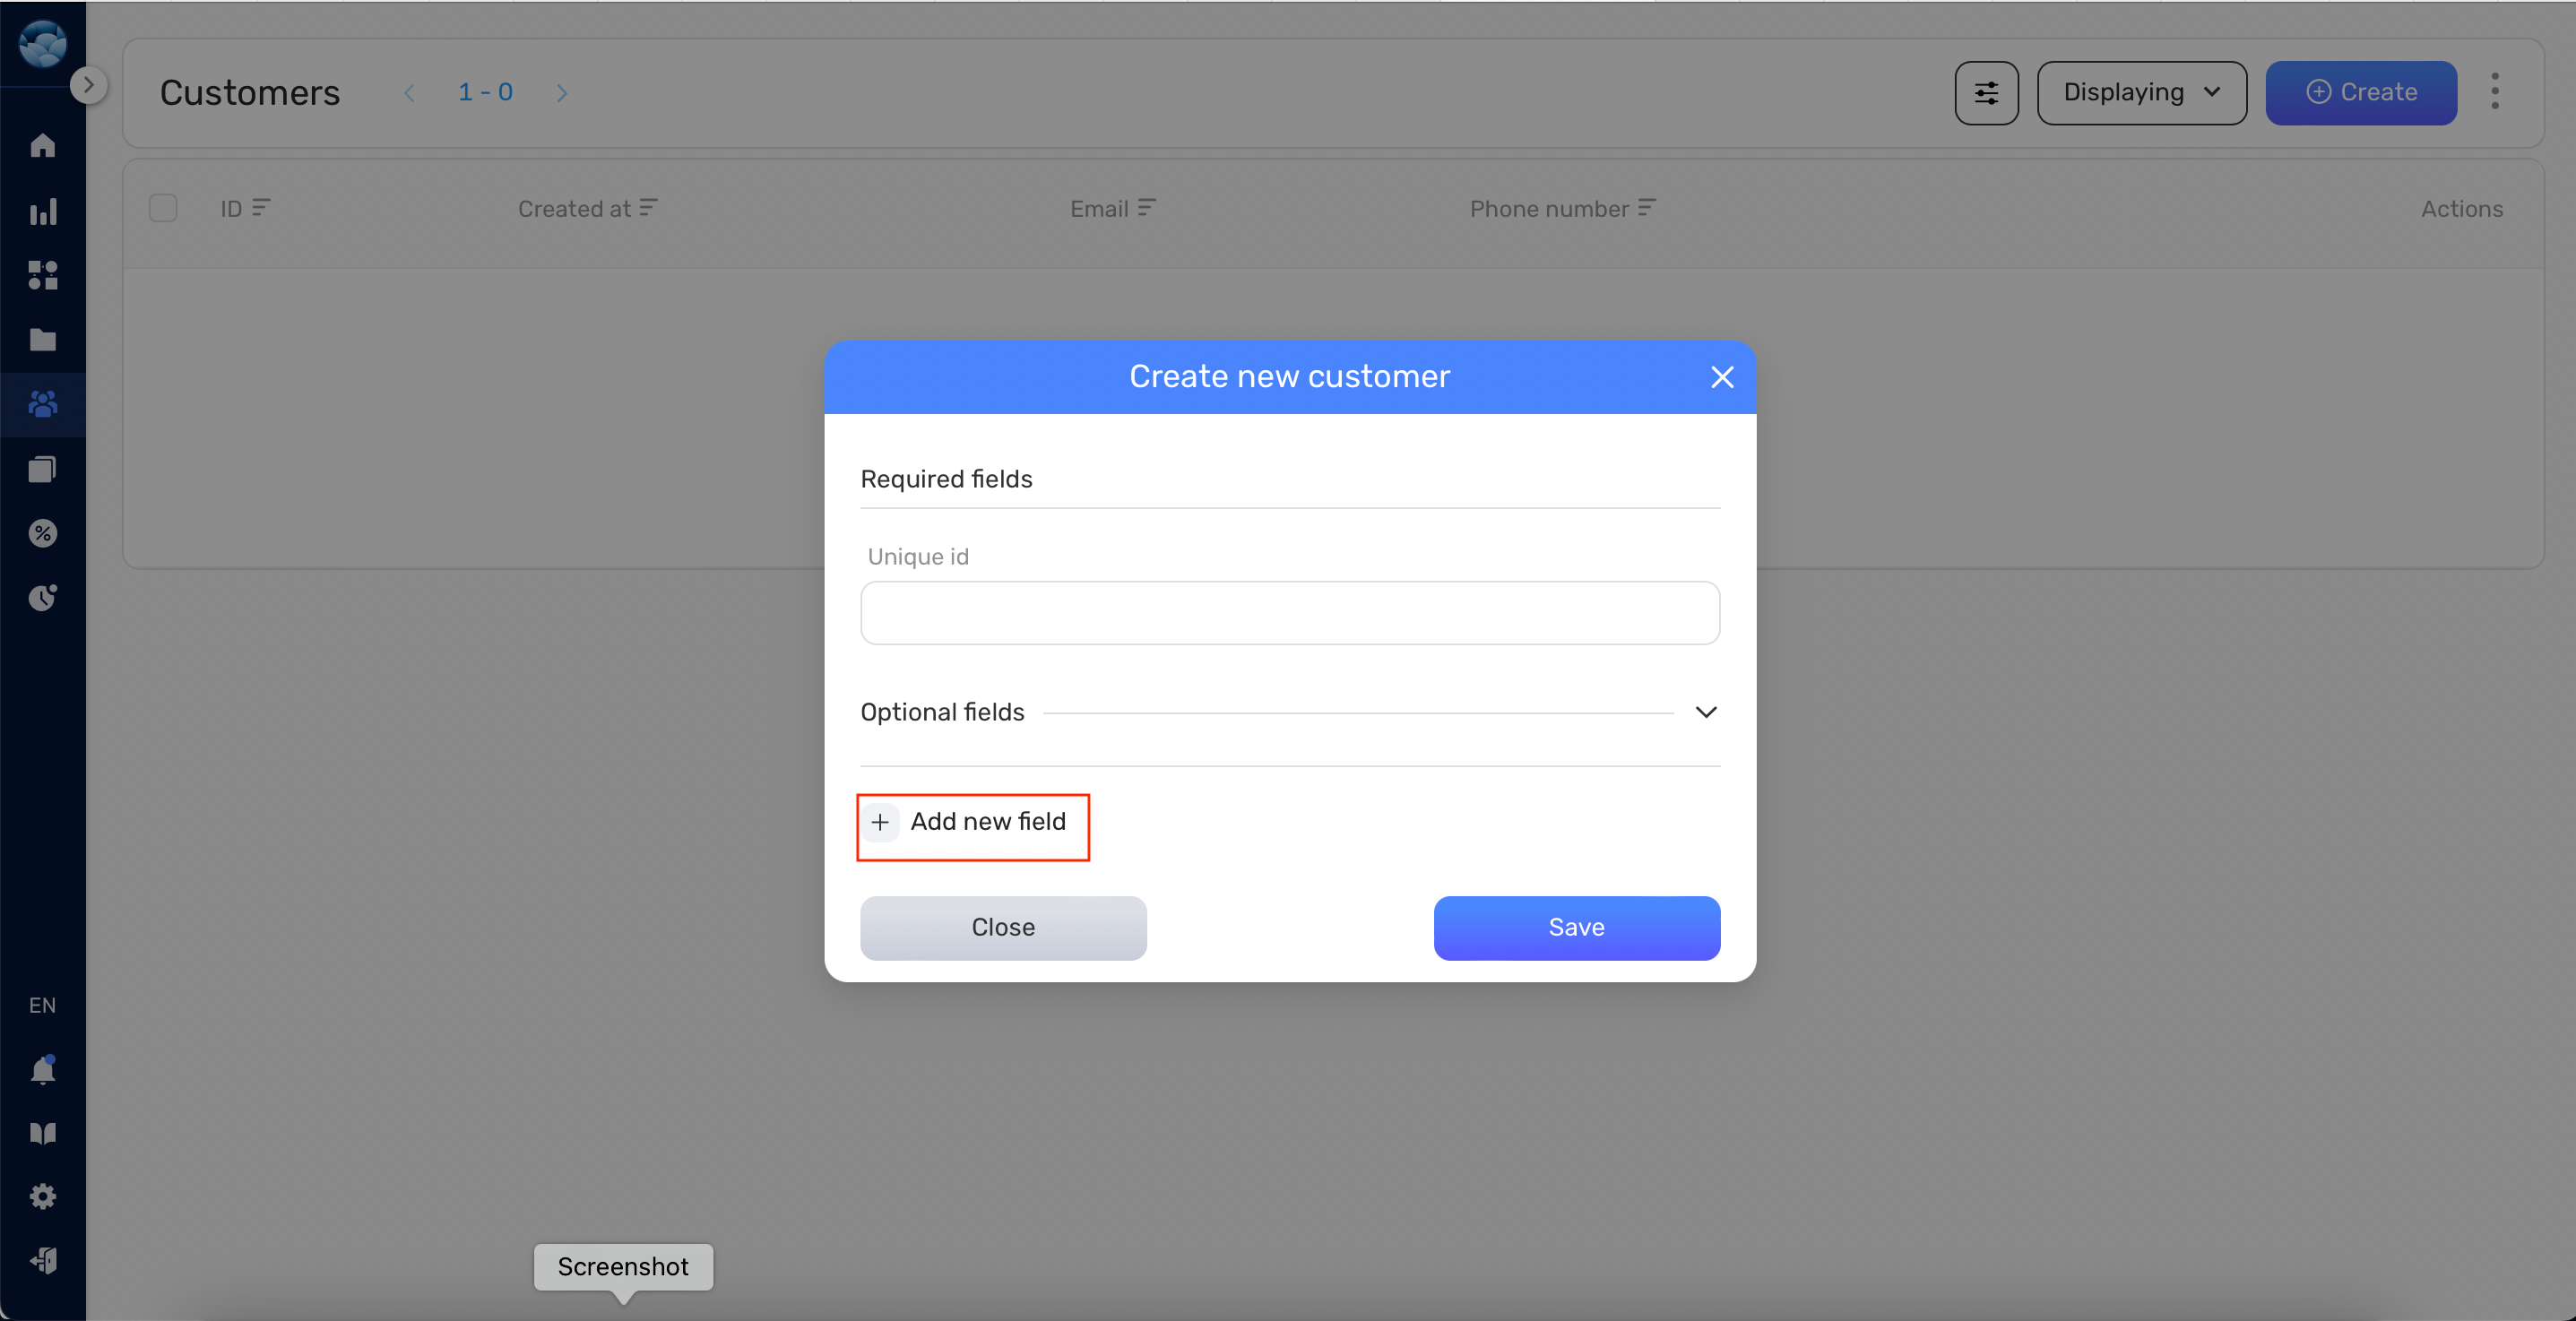
- If you need to create new fields, click the + Add new field button.
- Define a label for the field (the field’s name) and fill in its value.
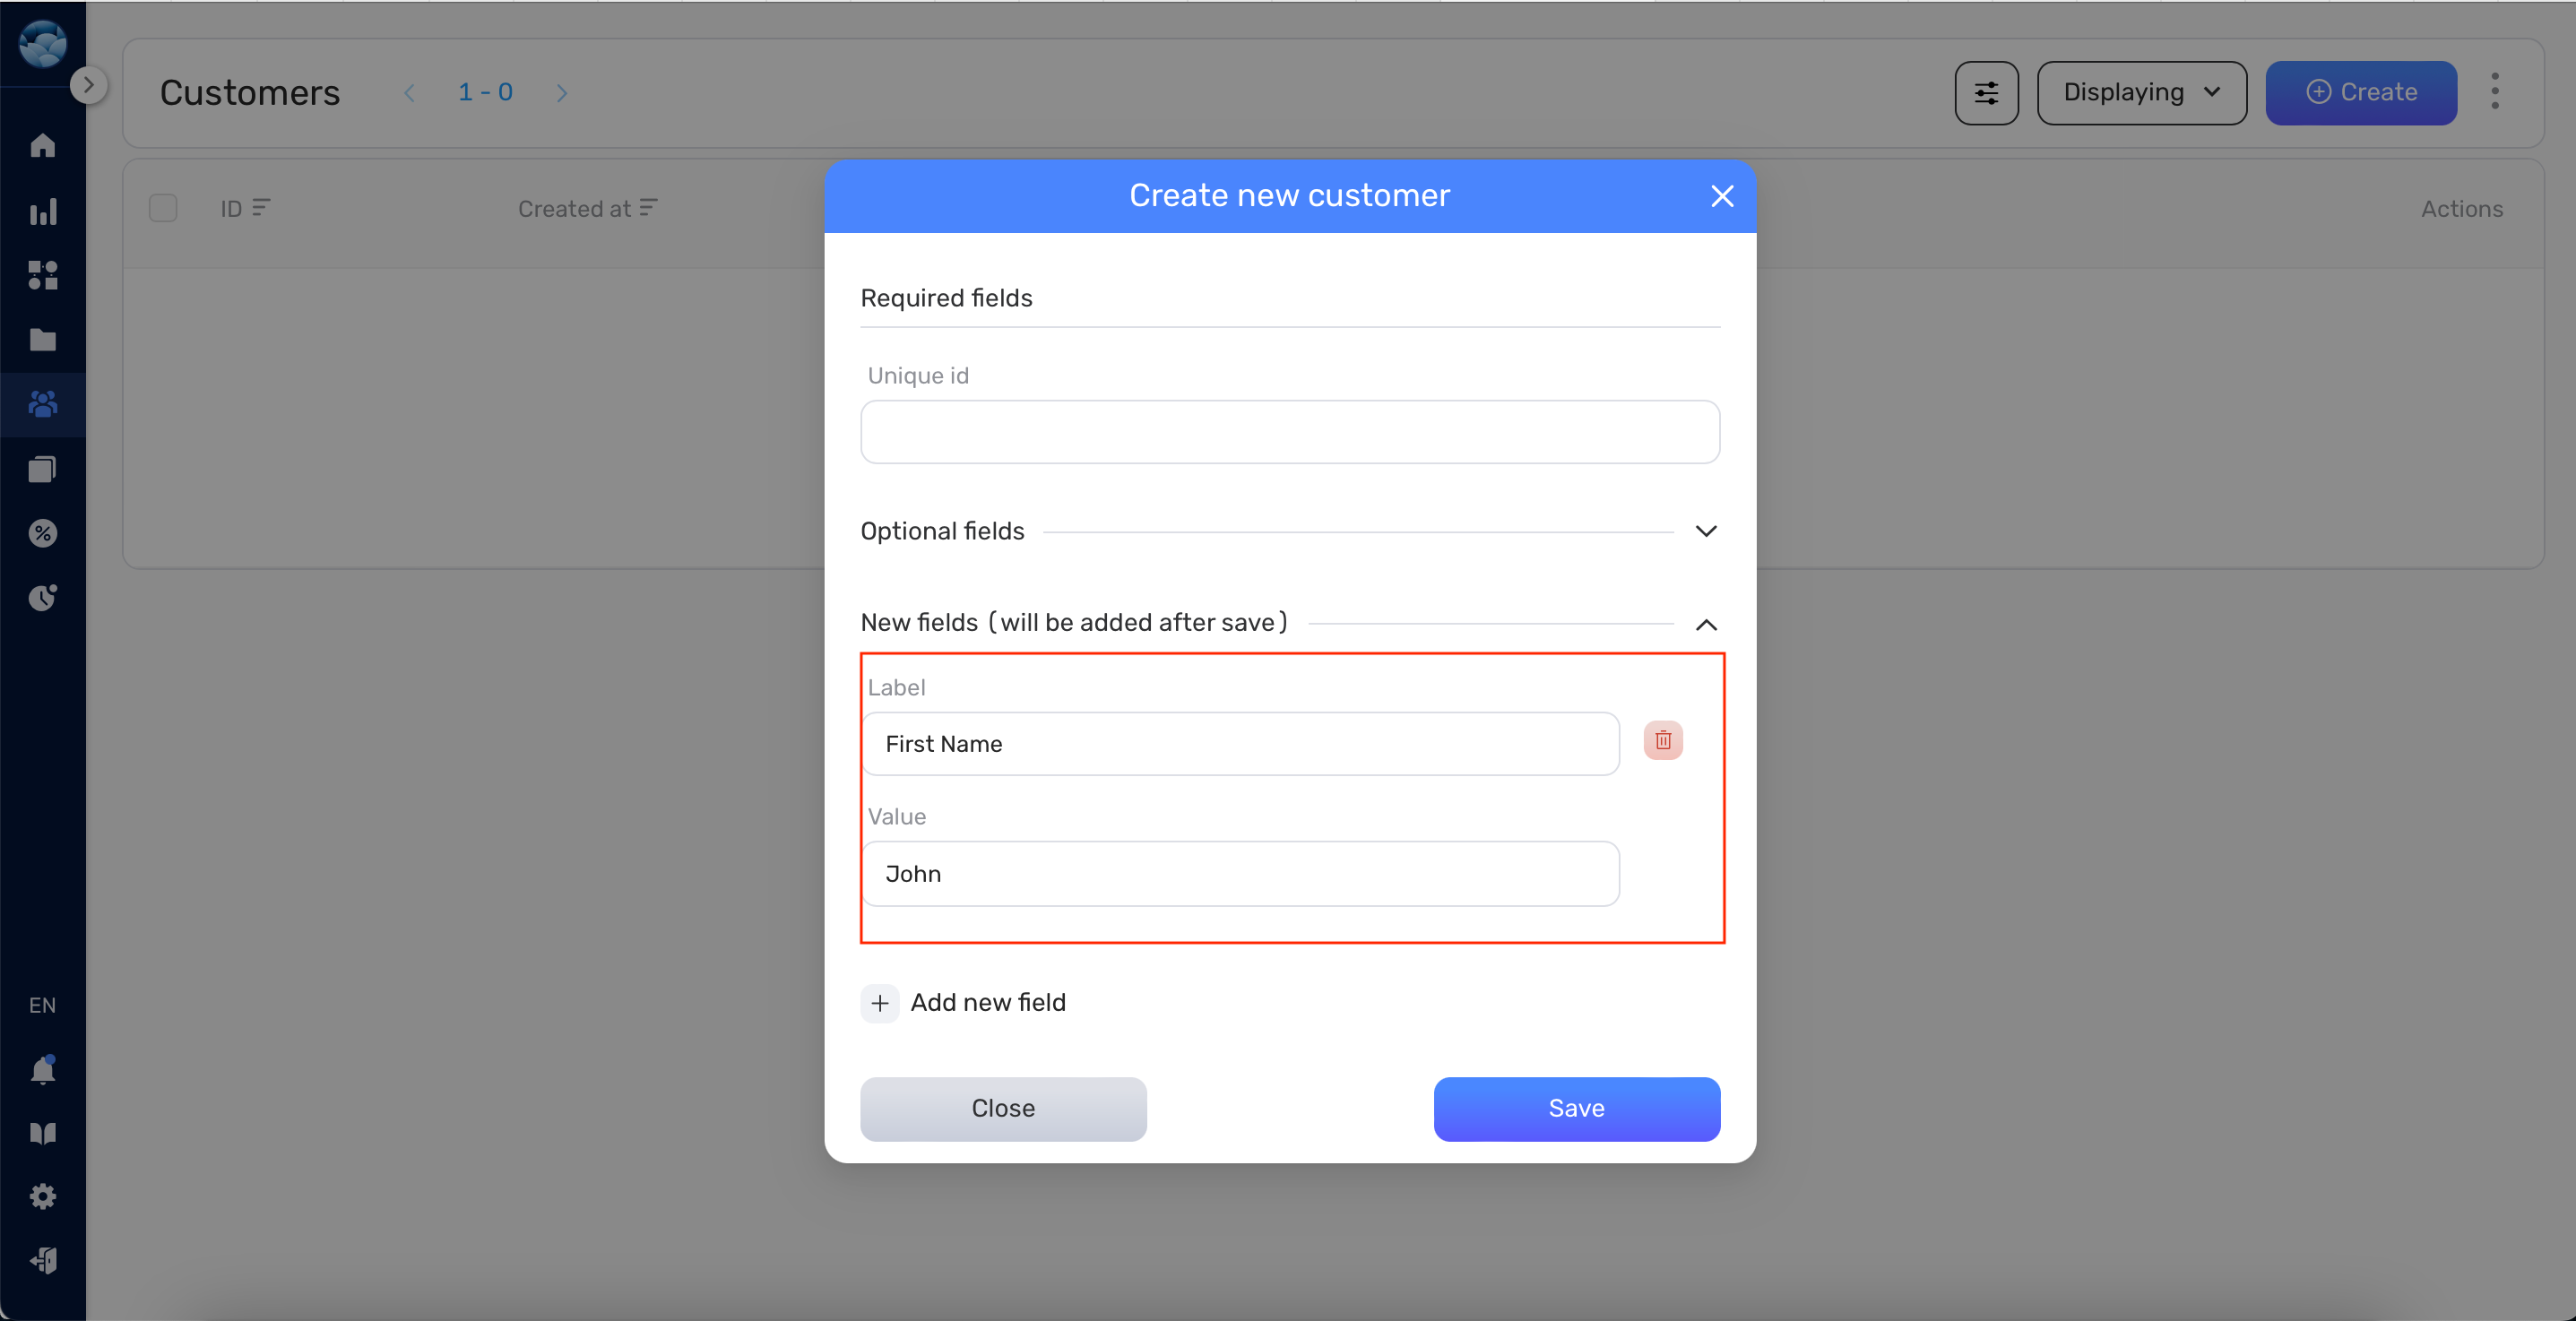
- Once you’ve entered all the necessary information, click Save. The new customer will now appear in your customers list.
Adding Notes to a Customer #
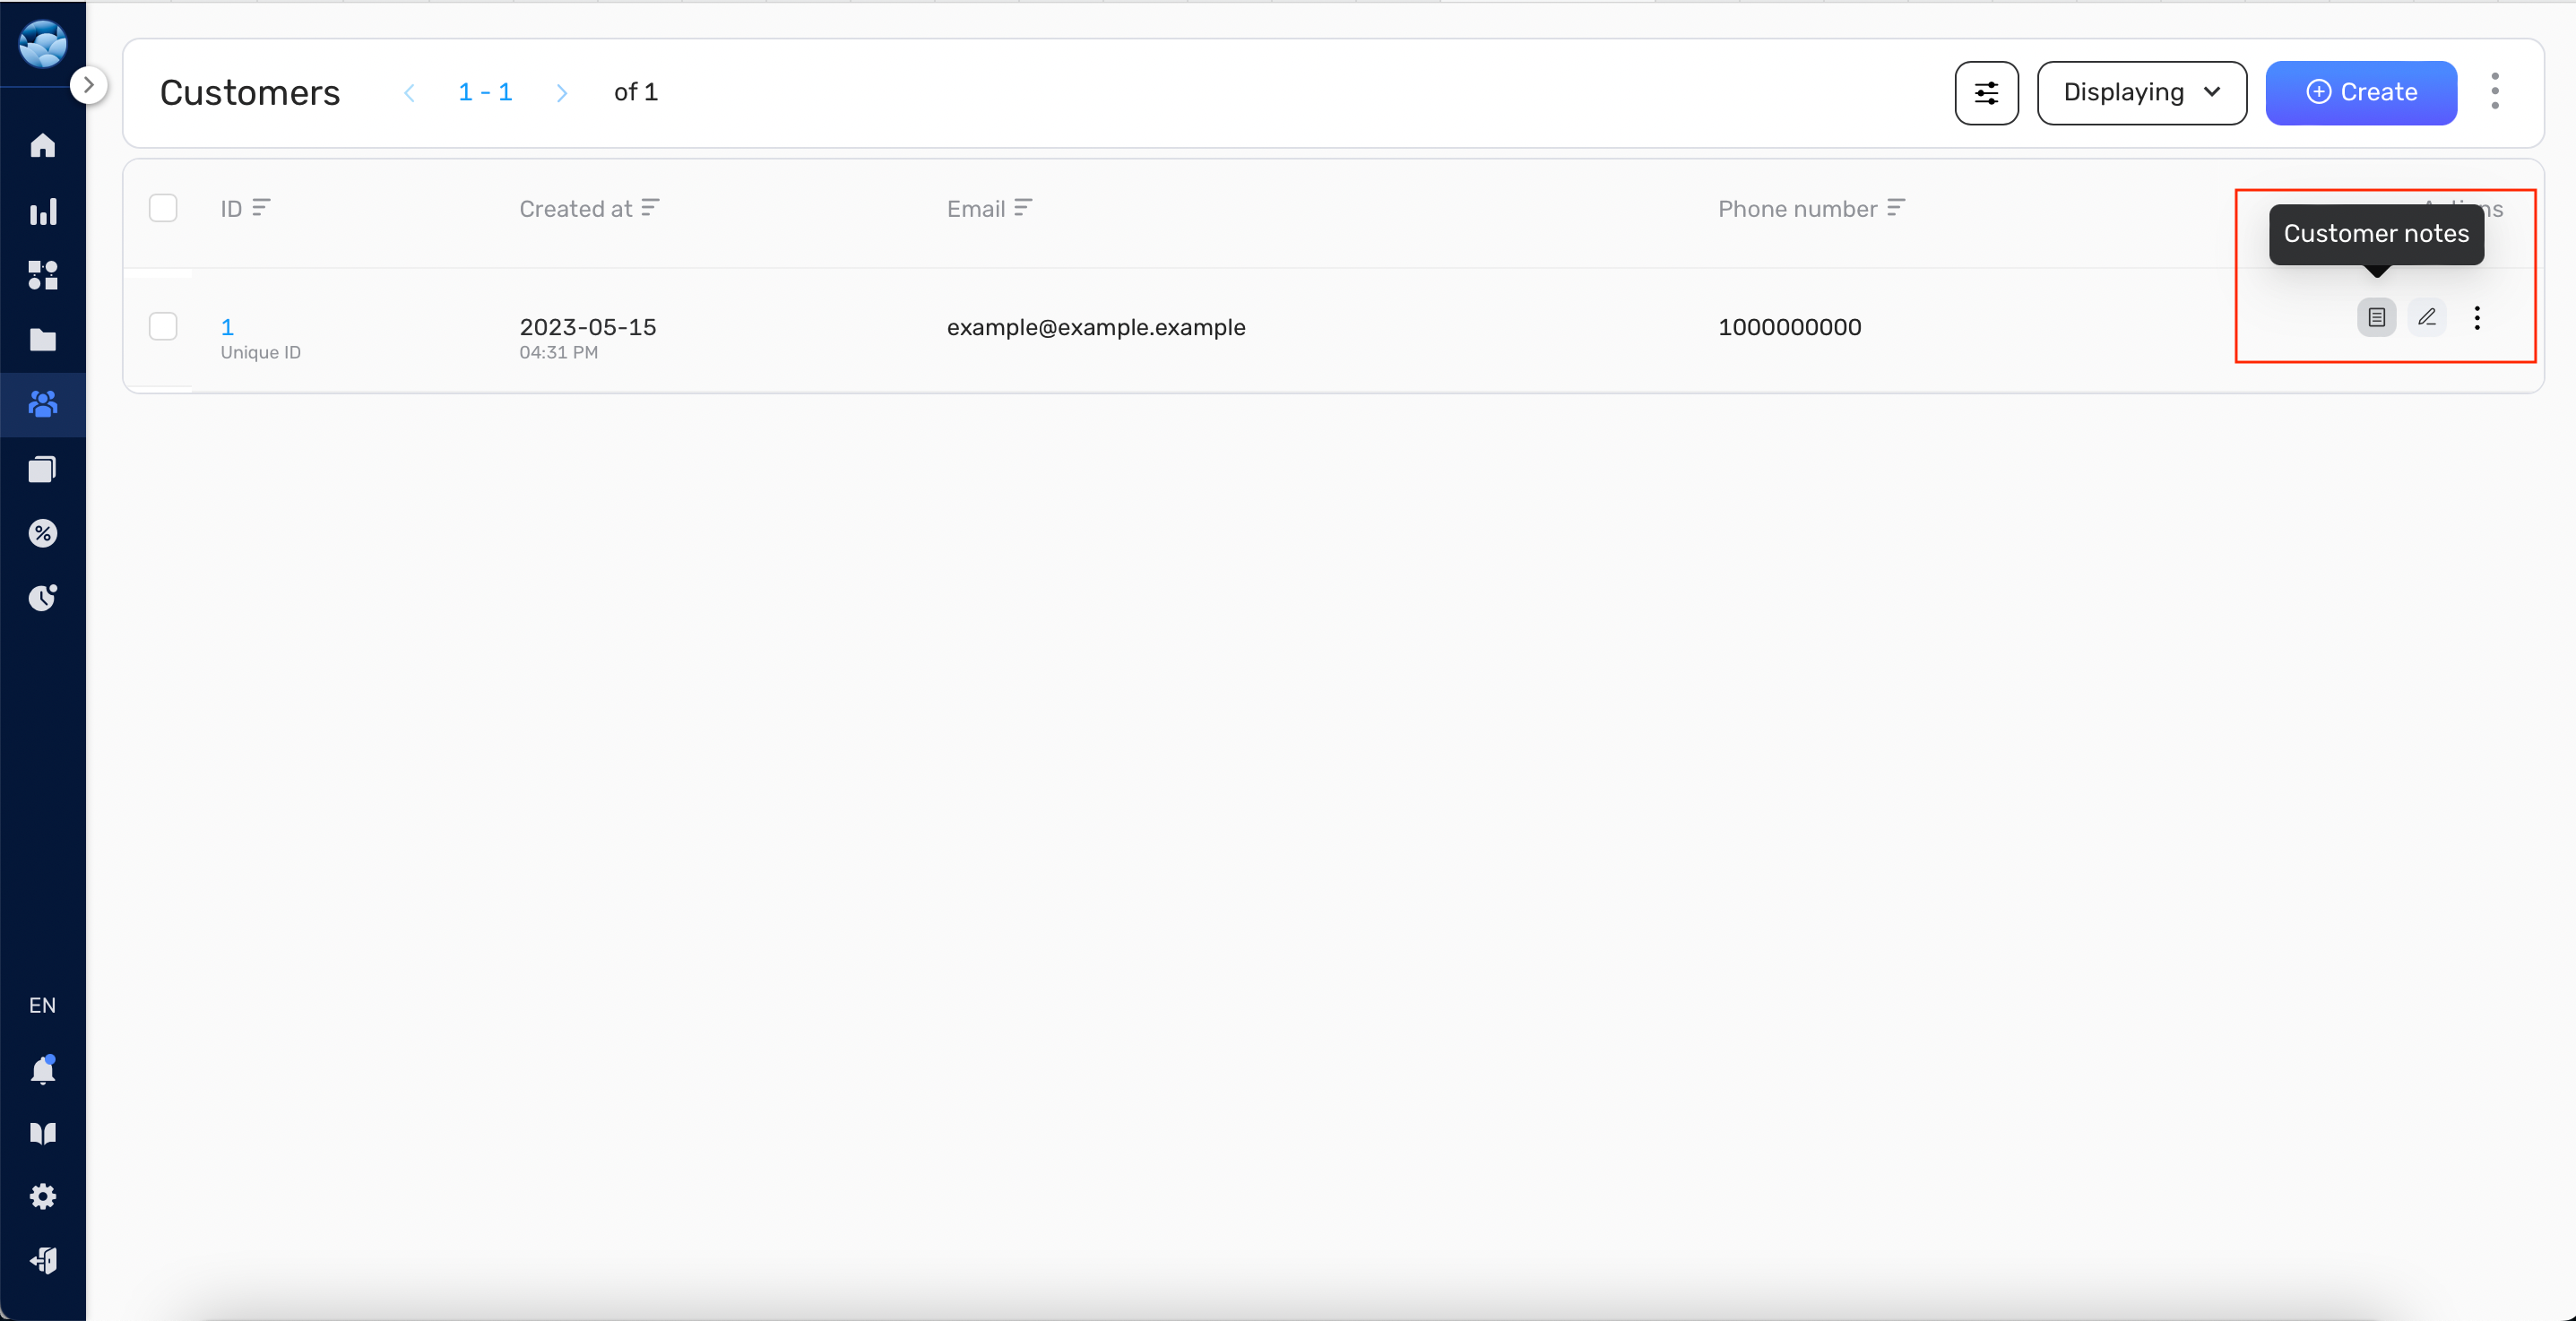
- To add a note to a customer, find the Customer Note icon under the “Action” column on the customer info page.
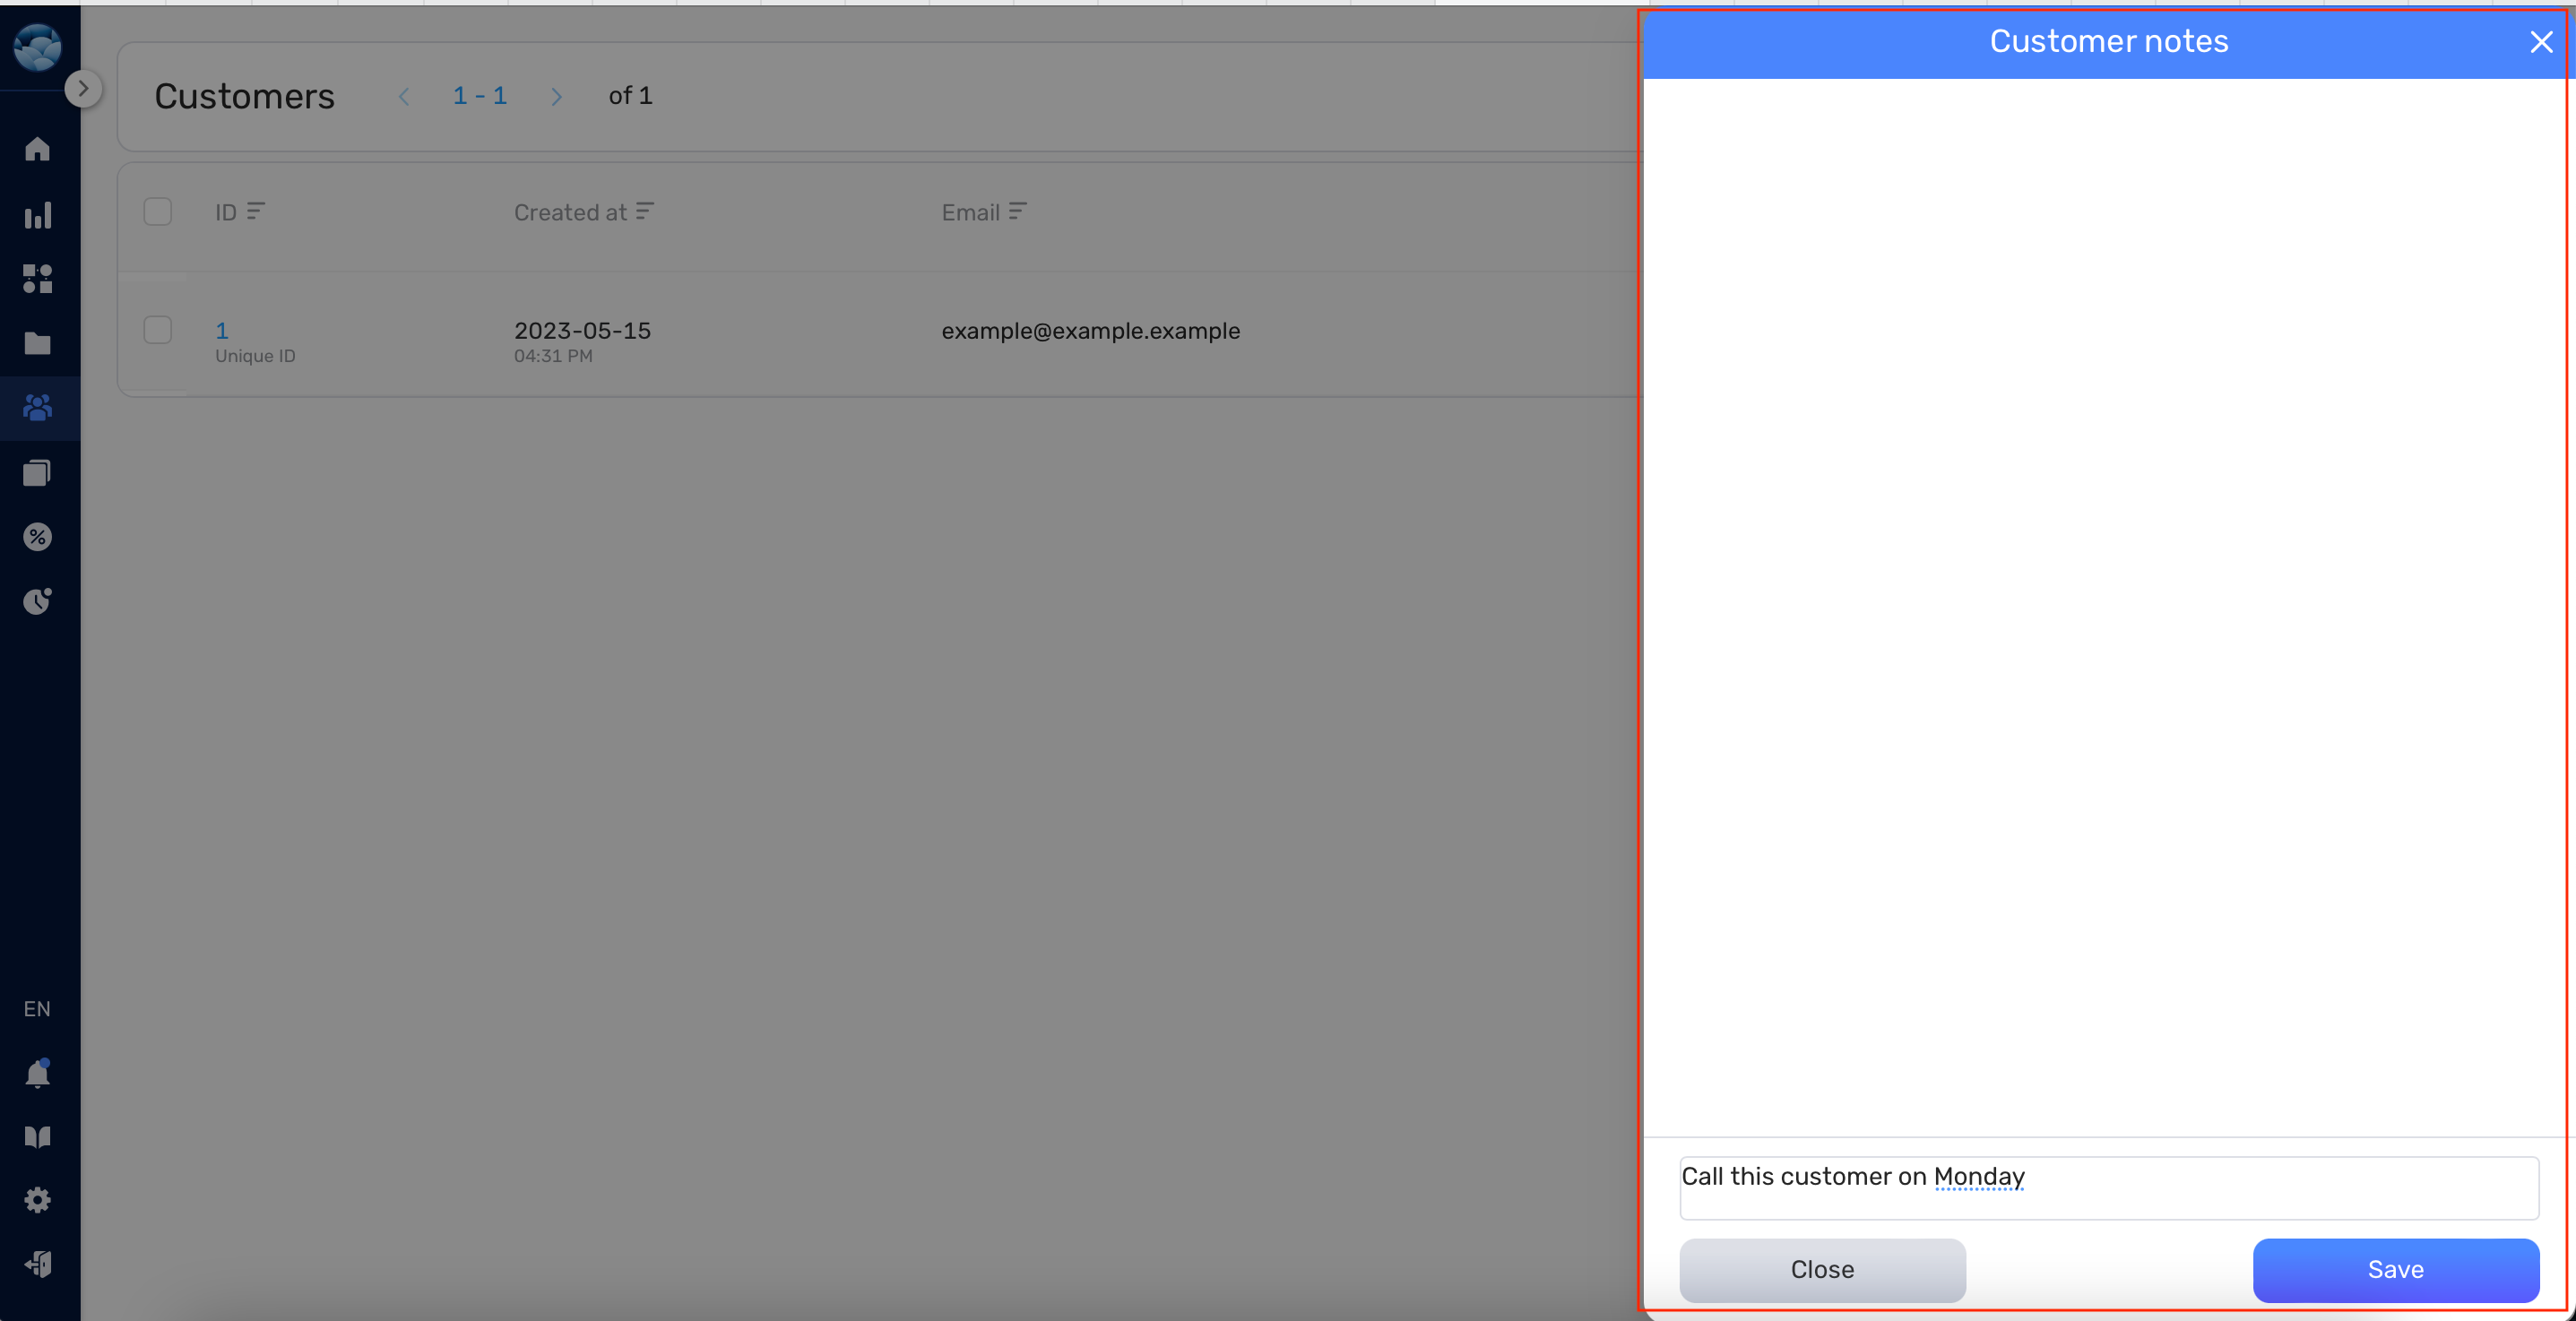
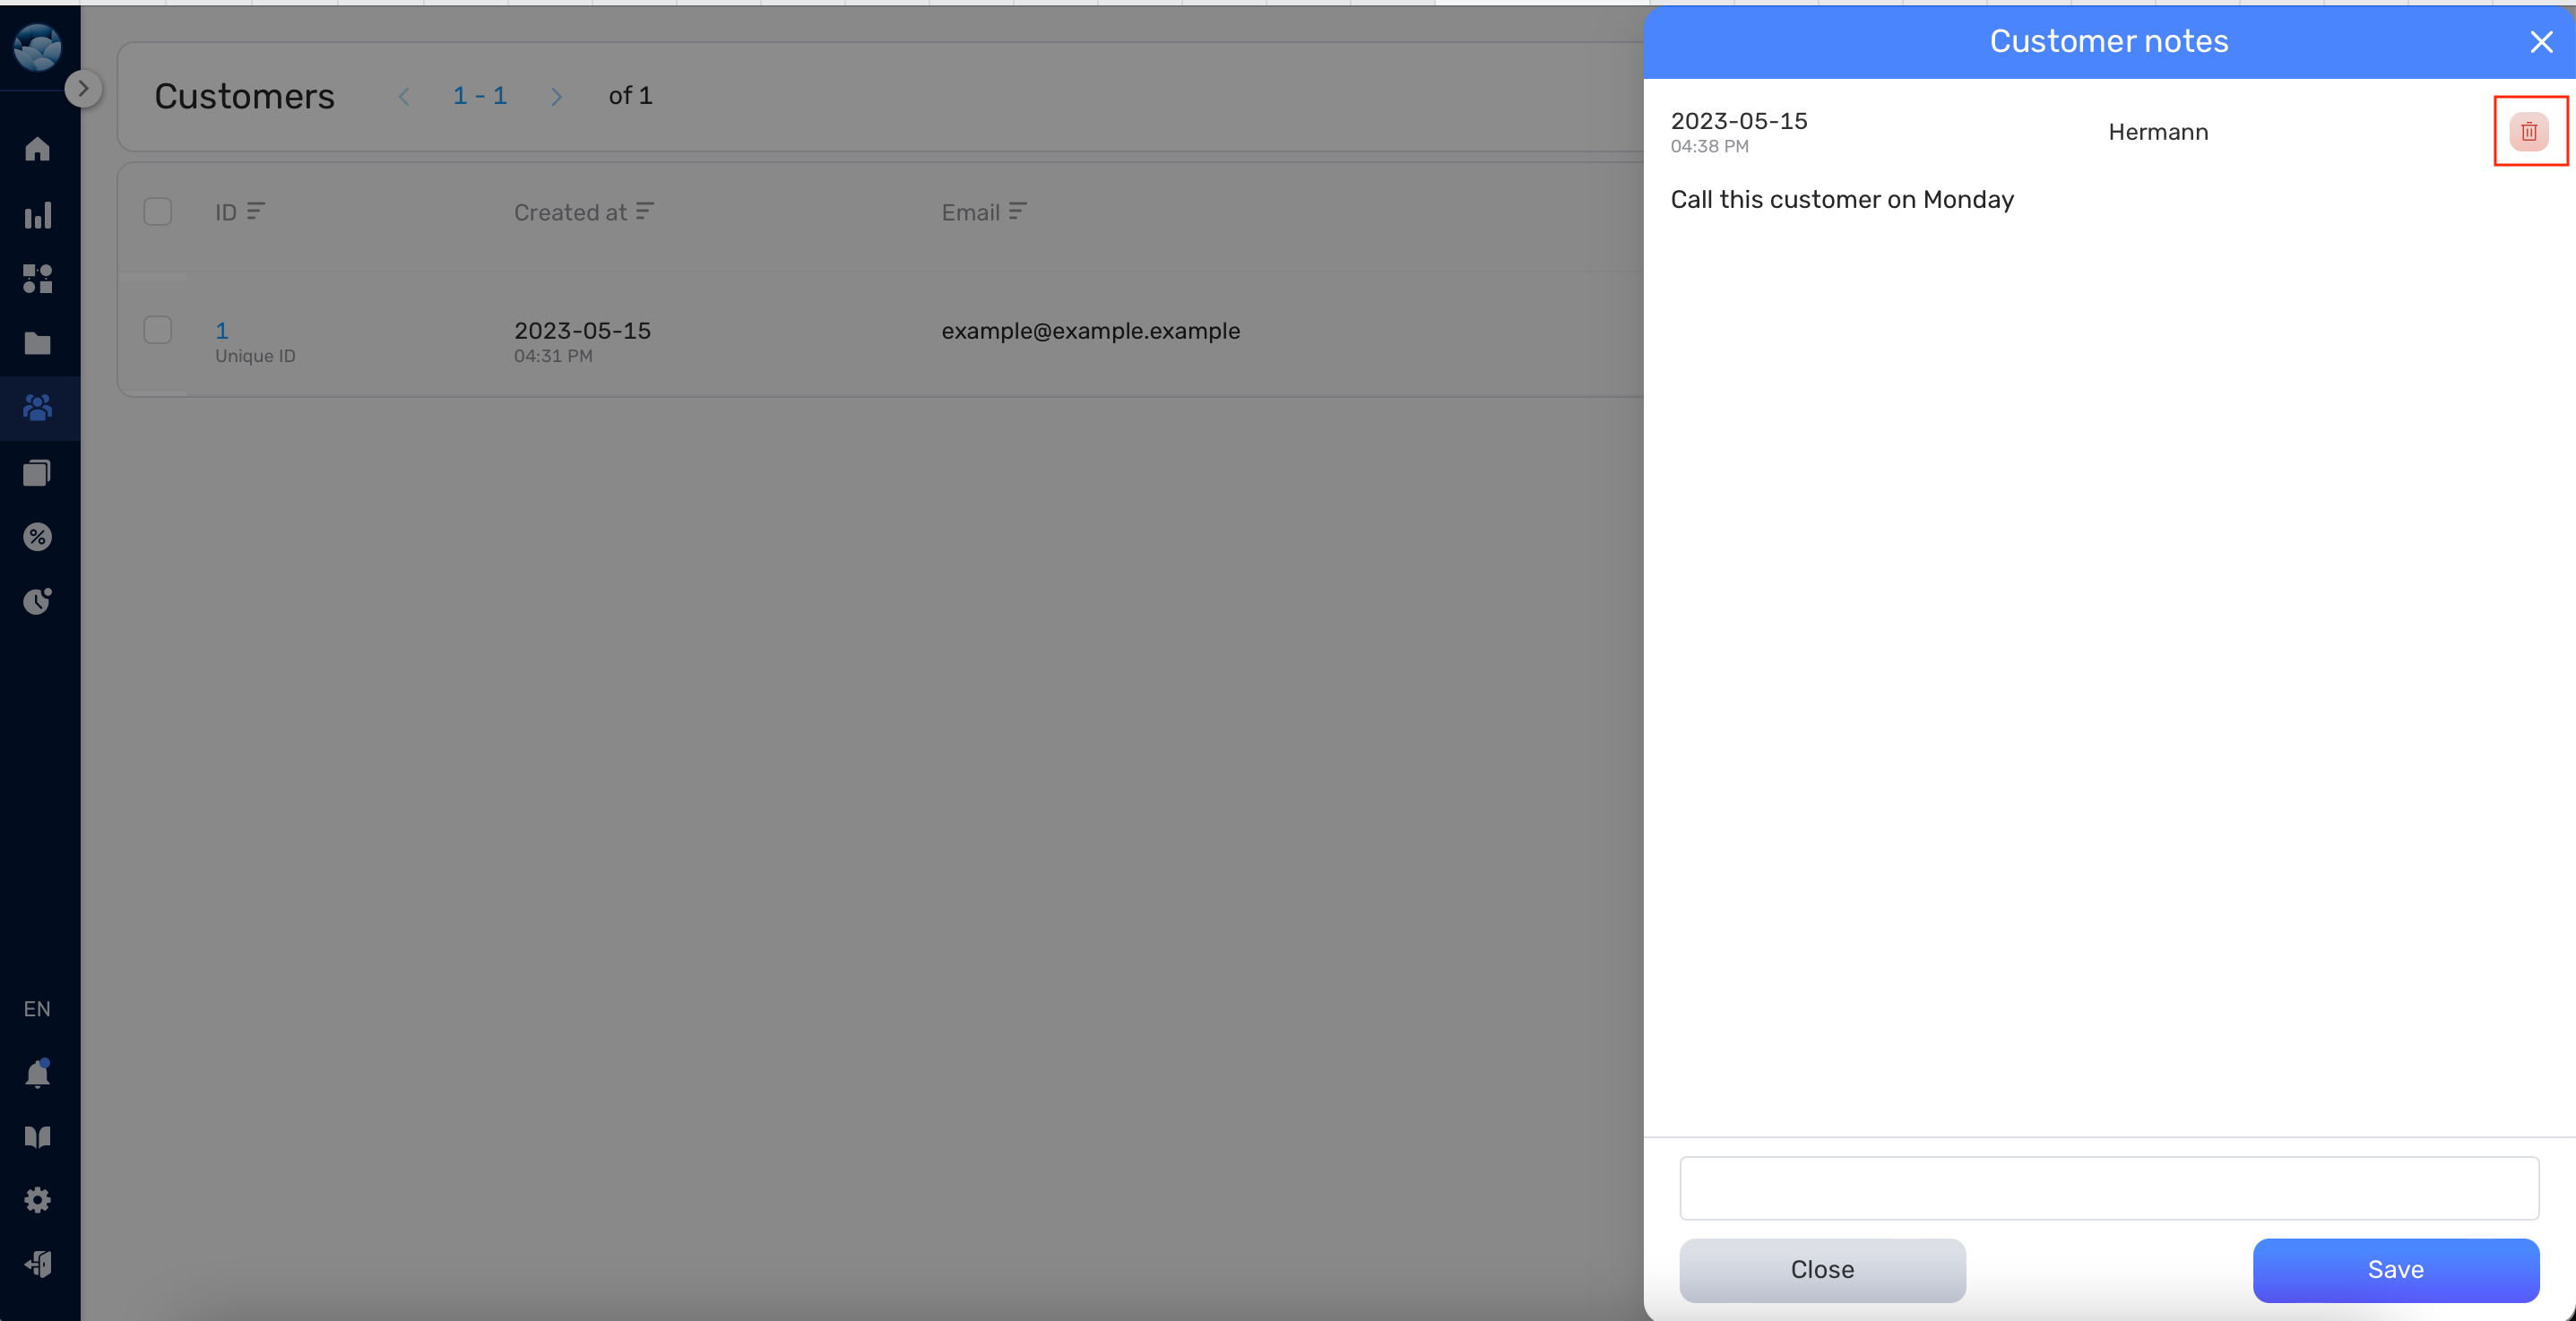
- Write your note, then click Save. The note will be added to the customer, complete with the creation date and customer information.
- If you need to remove a note, click on the Bin button.
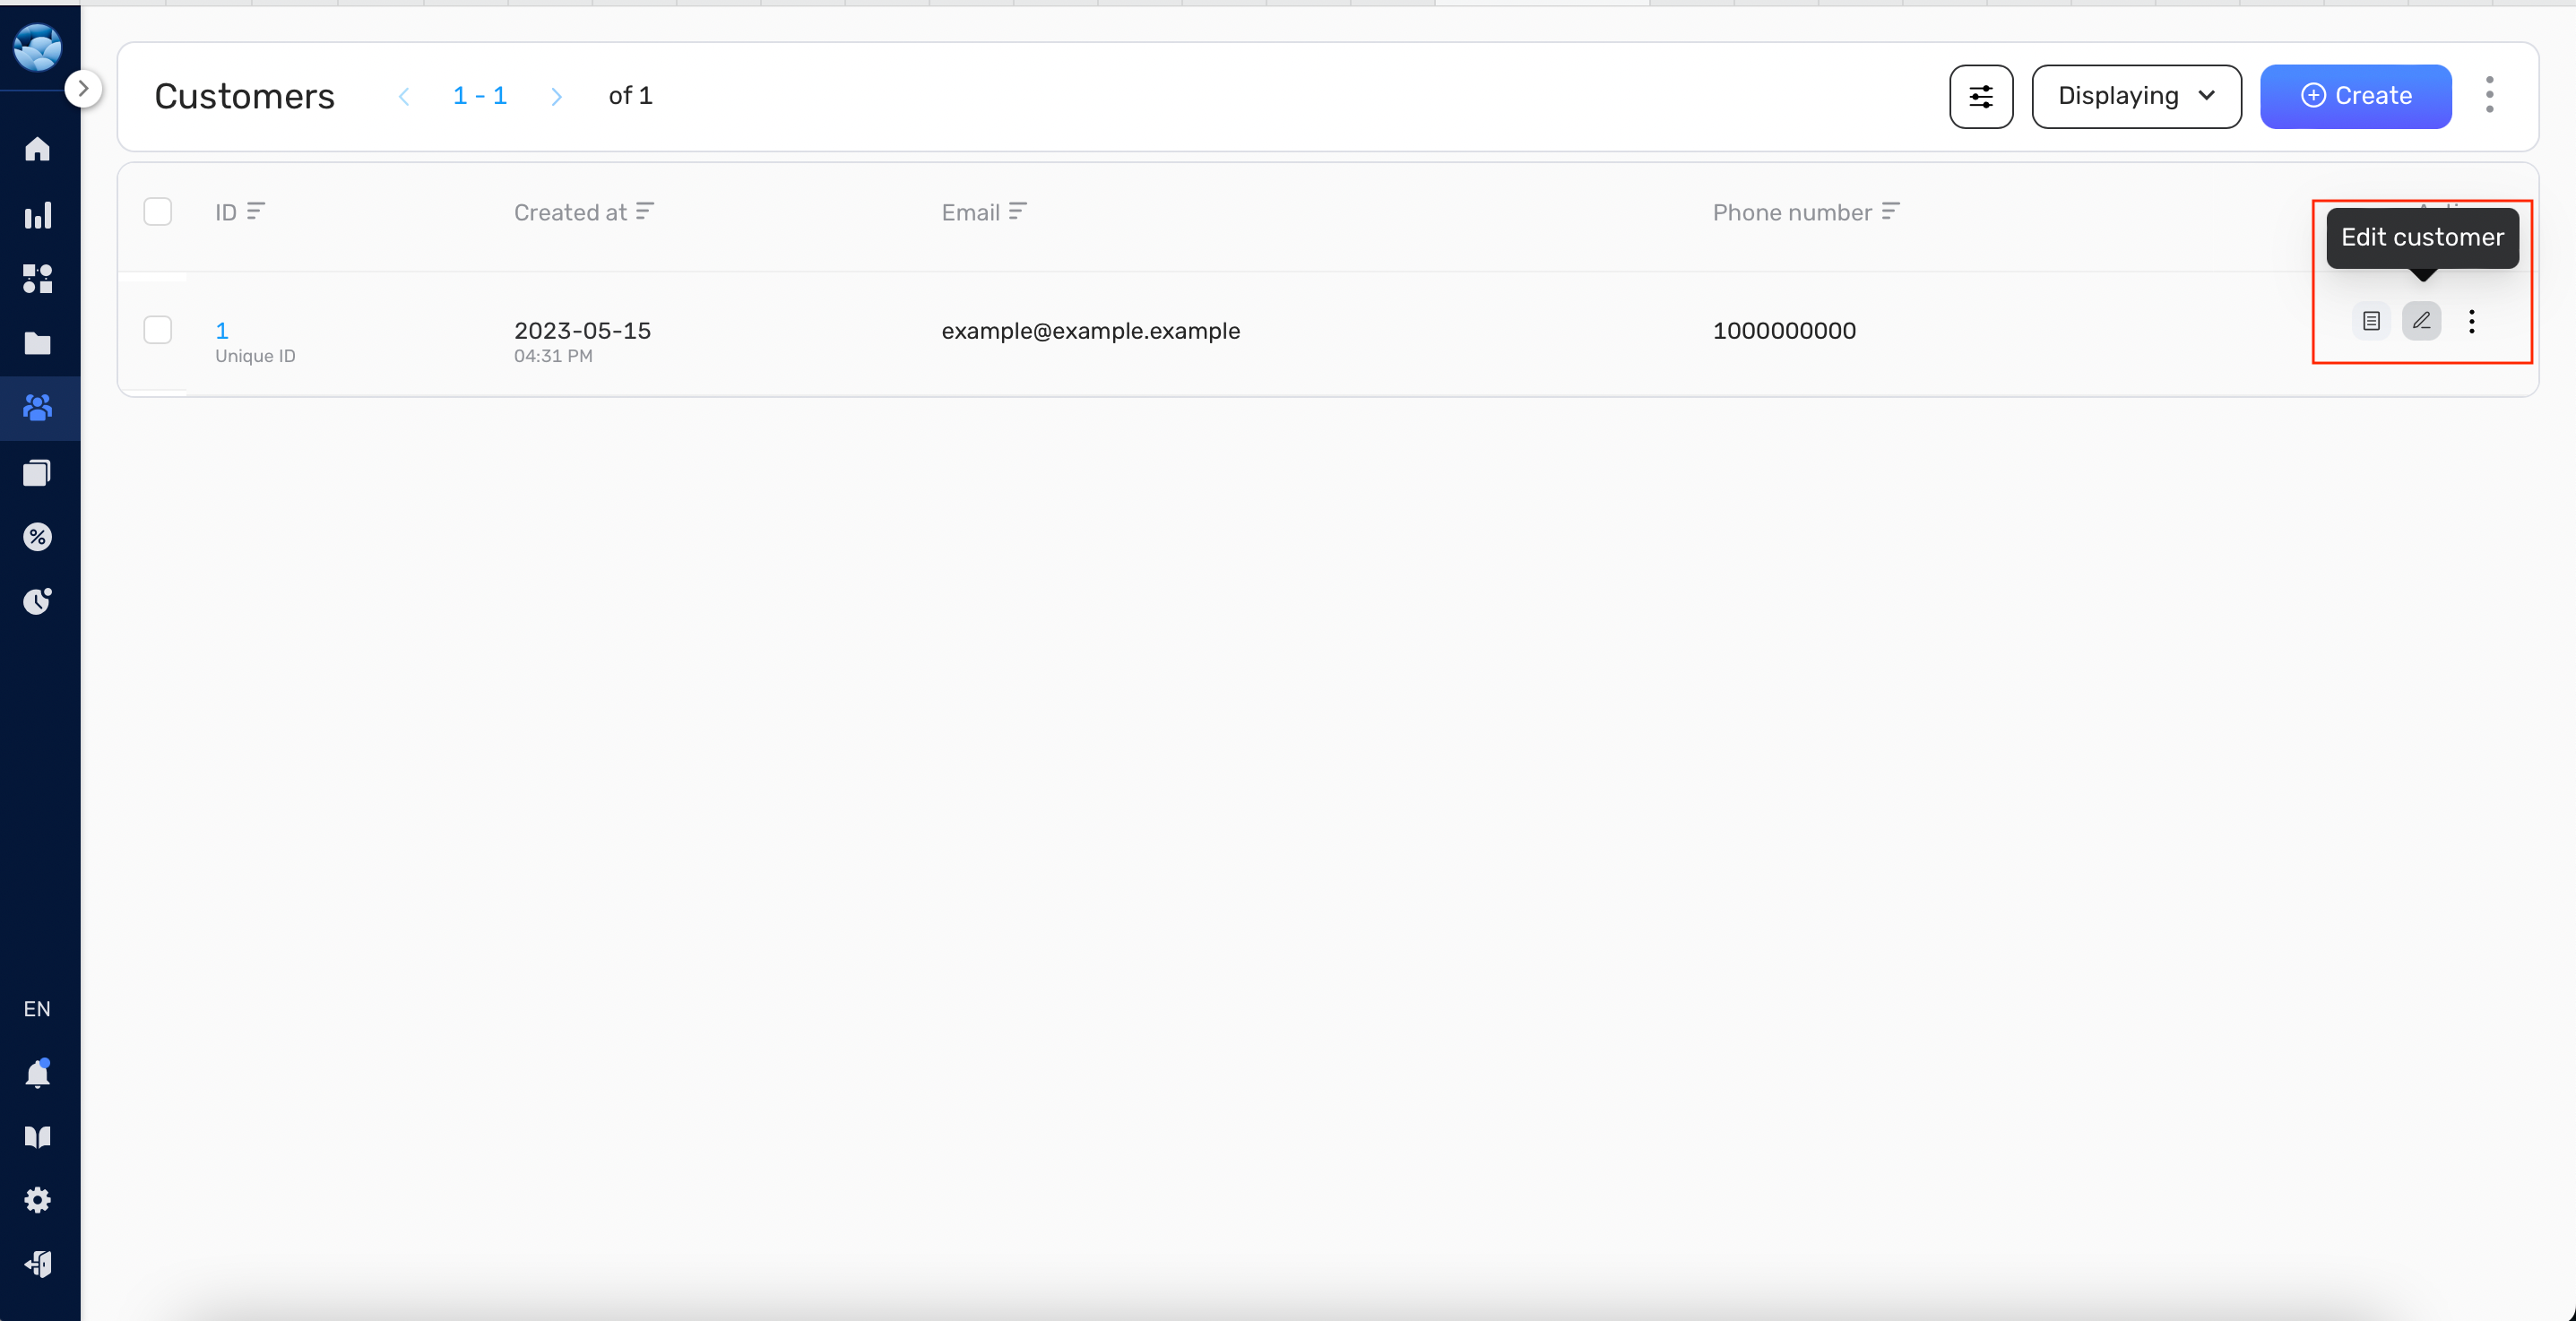
Editing or Deleting a customer #
- If you need to change a customer’s information, go to the “Action” column and click the Edit customer pencil icon.
- Make your changes, then click Save. Please be aware that the Unique Id cannot be changed once it’s been set.
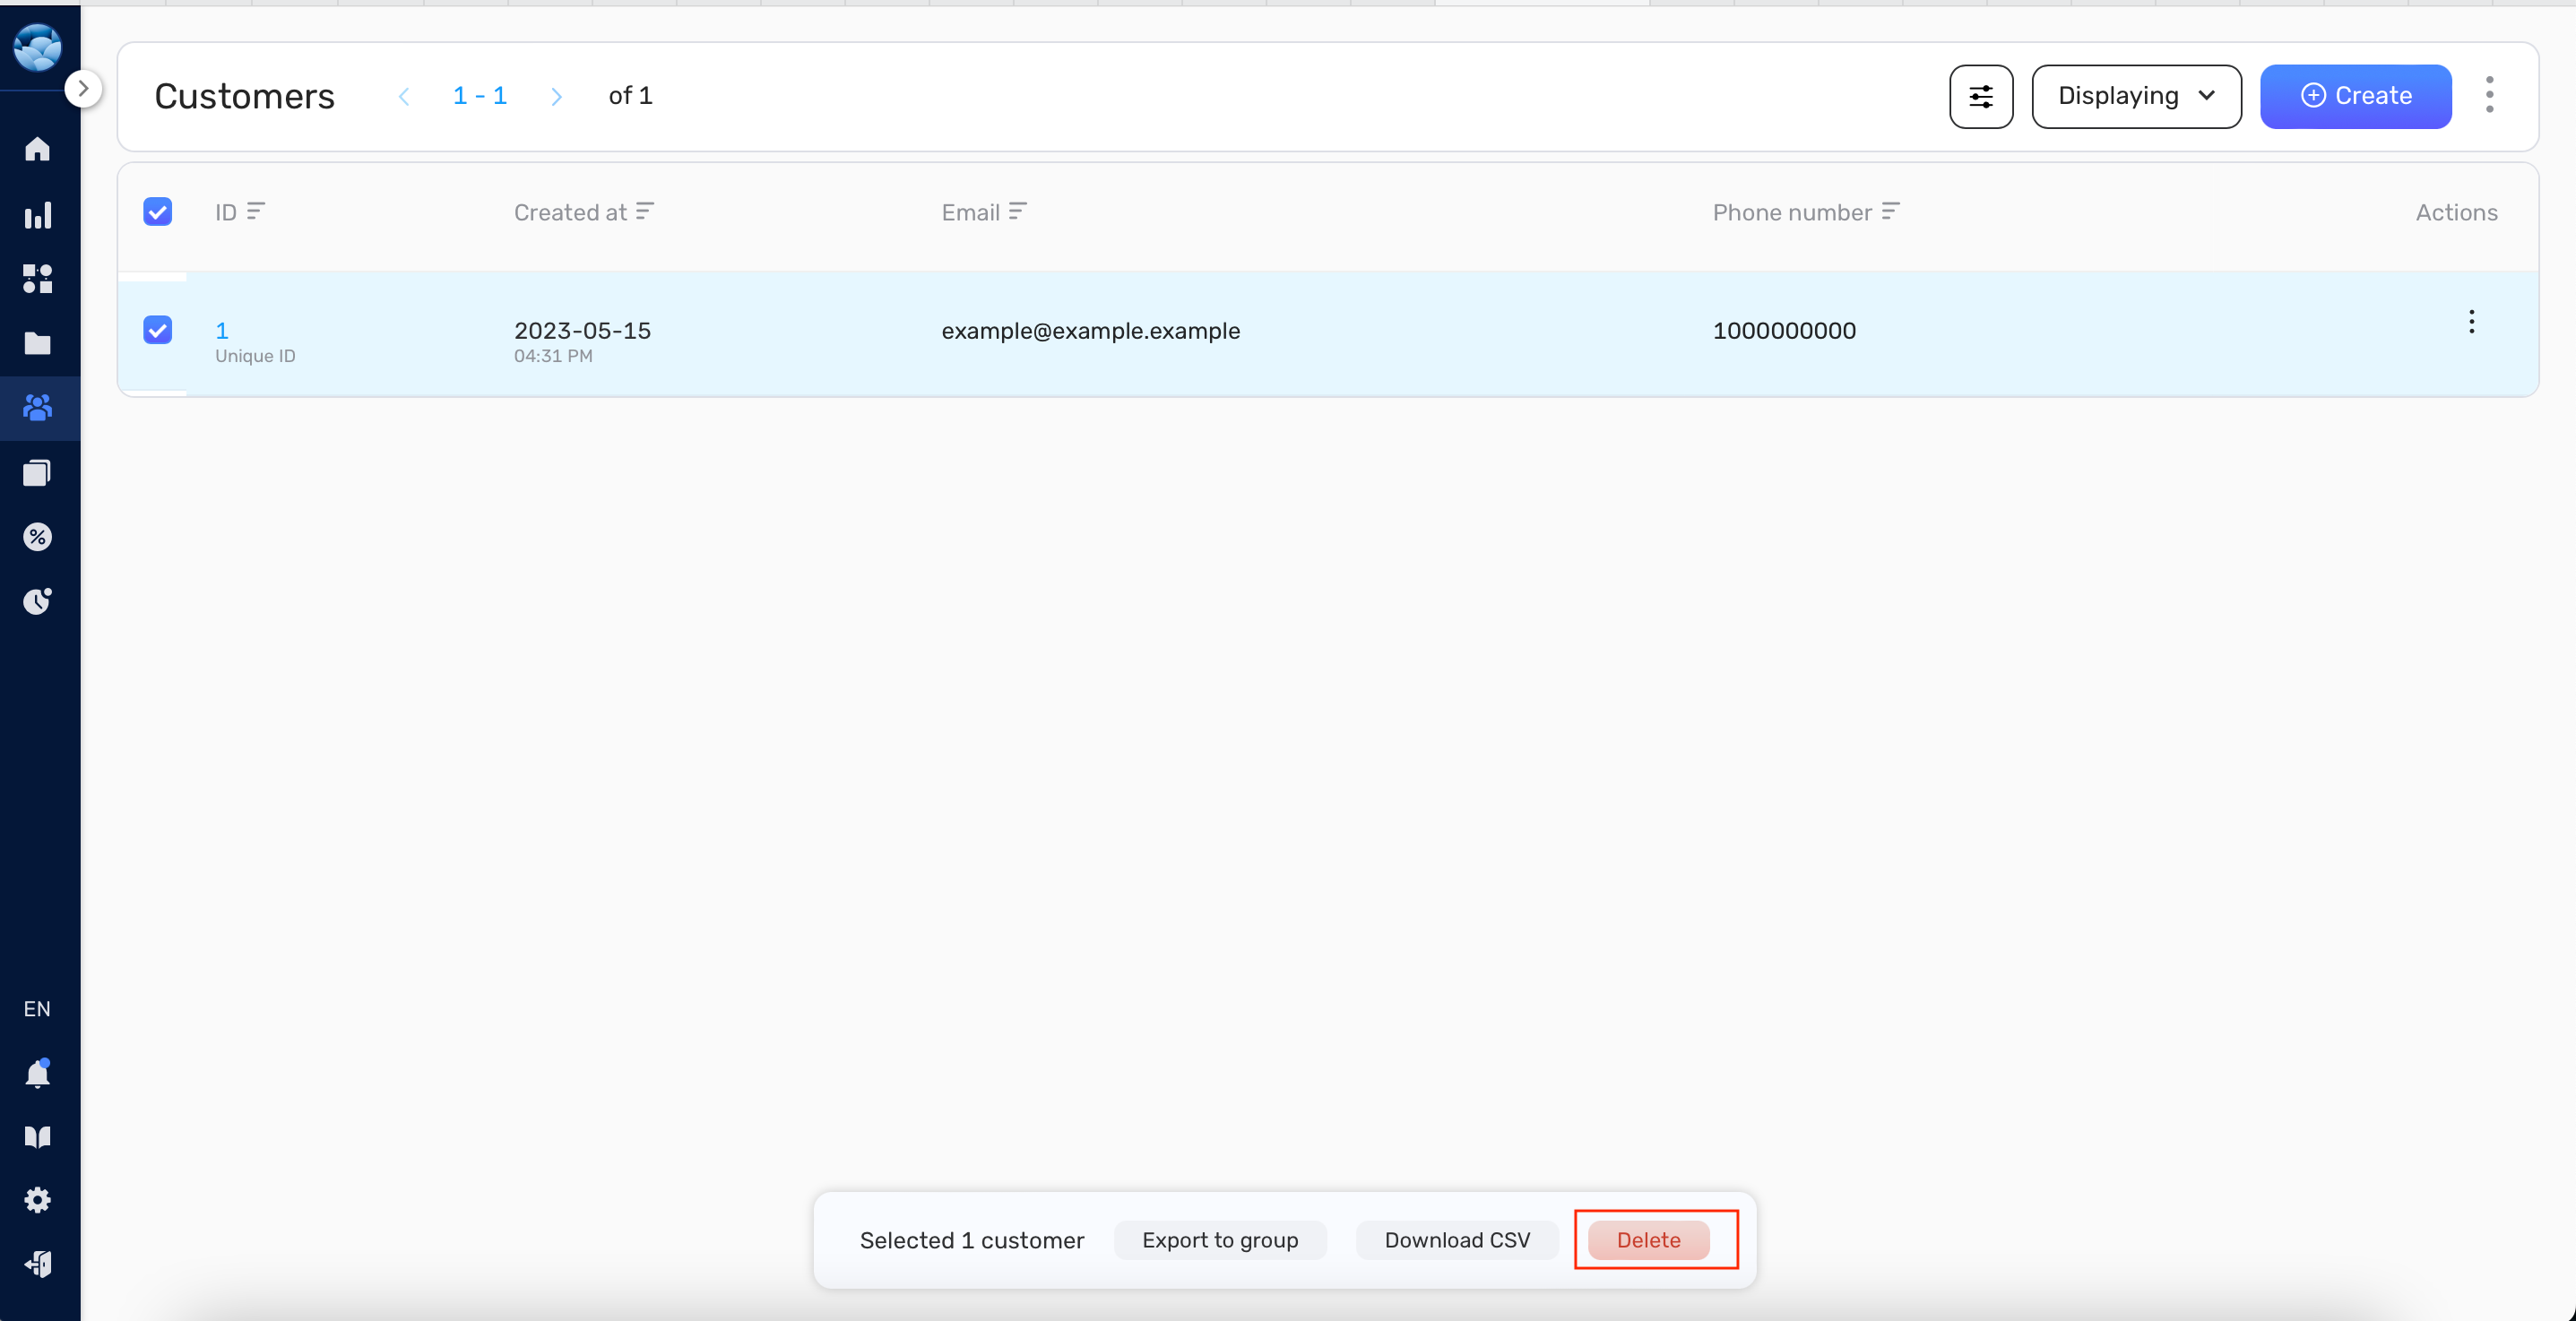
- If you need to delete a customer, select a customer that you need to delete and press Delete button.
Congratulations! You now know how to manually create, edit, and manage customers in Retainly. With this knowledge, you can ensure your customer lists are always accurate and up-to-date, allowing you to maintain effective communication with your network. Remember, Retainly is here to help streamline your customer management, so don’t hesitate to explore other features and functions within the platform to make the most of your experience. Happy networking!


